

Submit notebook jobs with jupyter-scheduler
Some Nebari users require scheduling notebook runs. This is now achievable with Jupyter-Scheduler, a JupyterLab extension that has been enhanced and integrated into Nebari. Additionally, users can monitor their job status by accessing the <nebari-domain>/argo endpoint.
Notebook jobs are useful in situations where you need no human interaction in the notebook and the results can be efficiently saved to your home directory, the cloud, or other storage locations. It is also useful in situations where the notebook might run for a long time and the user needs to shut down their JupyterLab server.
Jupyter-Scheduler is included by default in the base Nebari JupyterLab image and can be used with any conda-store environment available to the notebook author (papermill must be included in the environment).
Submitting a Notebook as a Jupyter-Scheduler Job
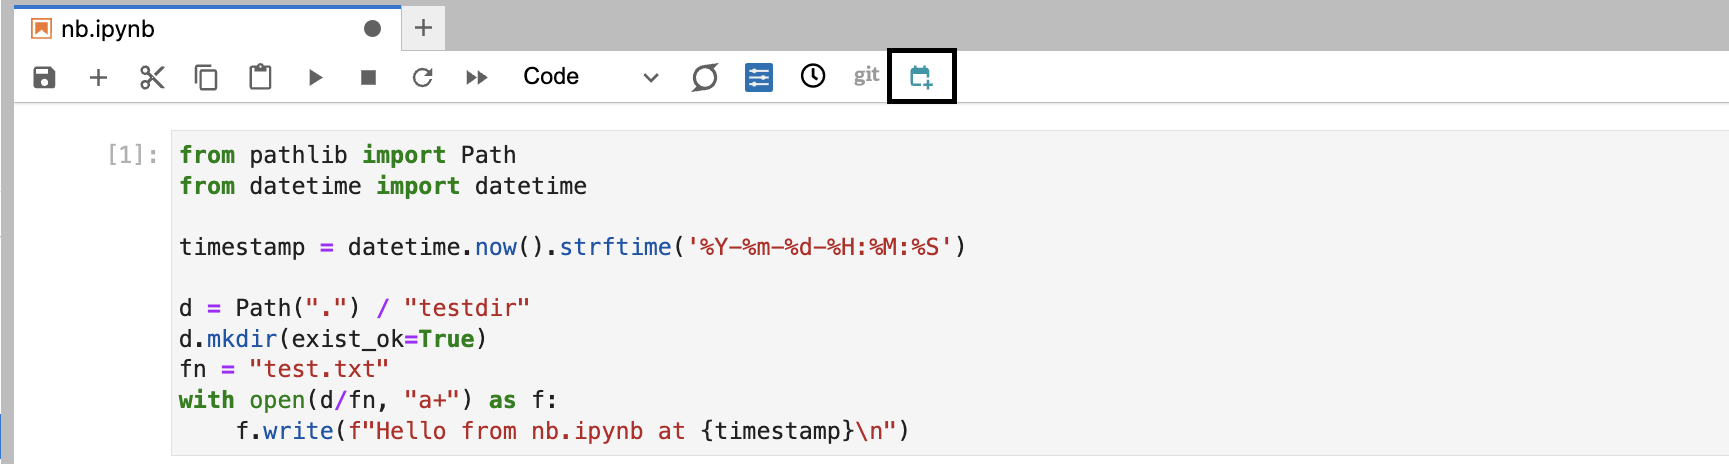
Section titled “Submitting a Notebook as a Jupyter-Scheduler Job”To submit your job, simply click the Jupyter-Scheduler icon on the top of your notebook toolbar.
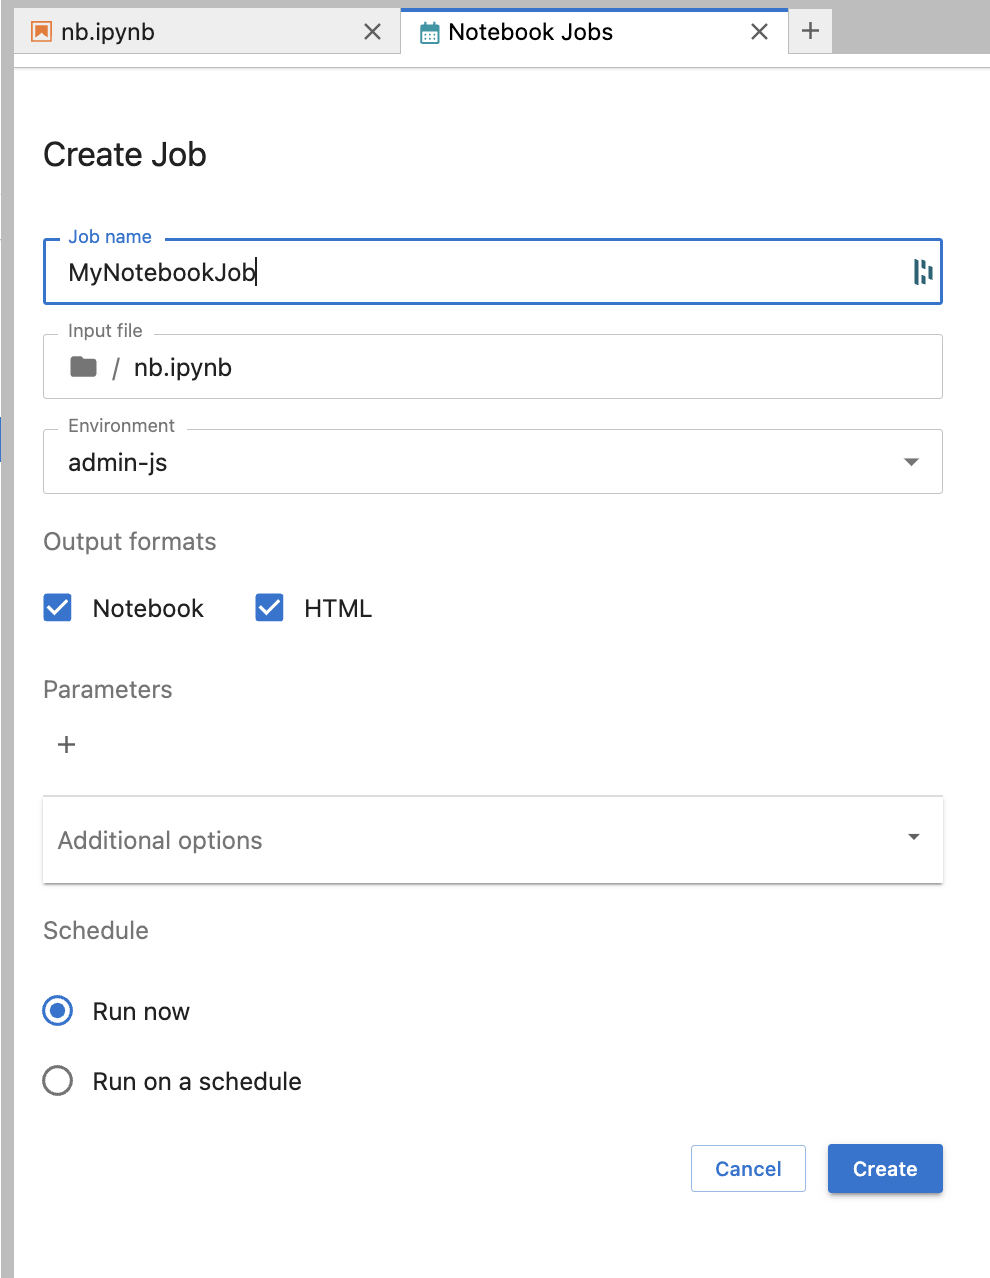
This will open a new Create Job tab. Fill out the form and click "Create" to create a schedule.
Once created, the status of the job and the notebook output can be viewed from the Jupyter-Scheduler Notebook Jobs UI:
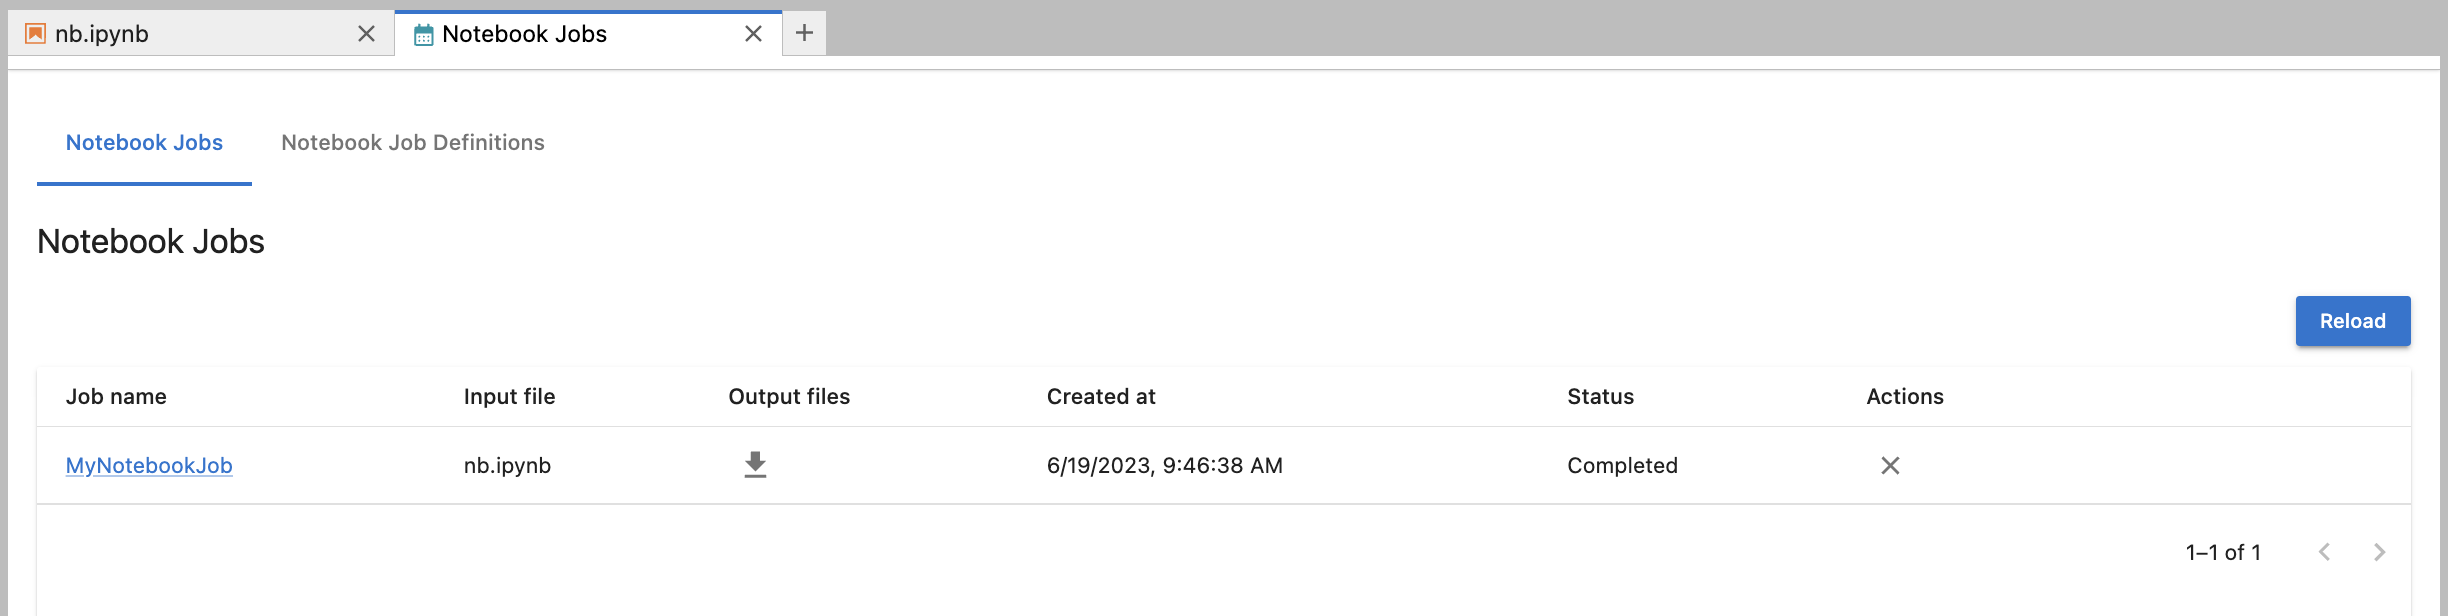
The output of your job will be accessible via the download icon in the "Output files" column. After you download the output, new links will replace the icon and point to the location of the downloaded output.
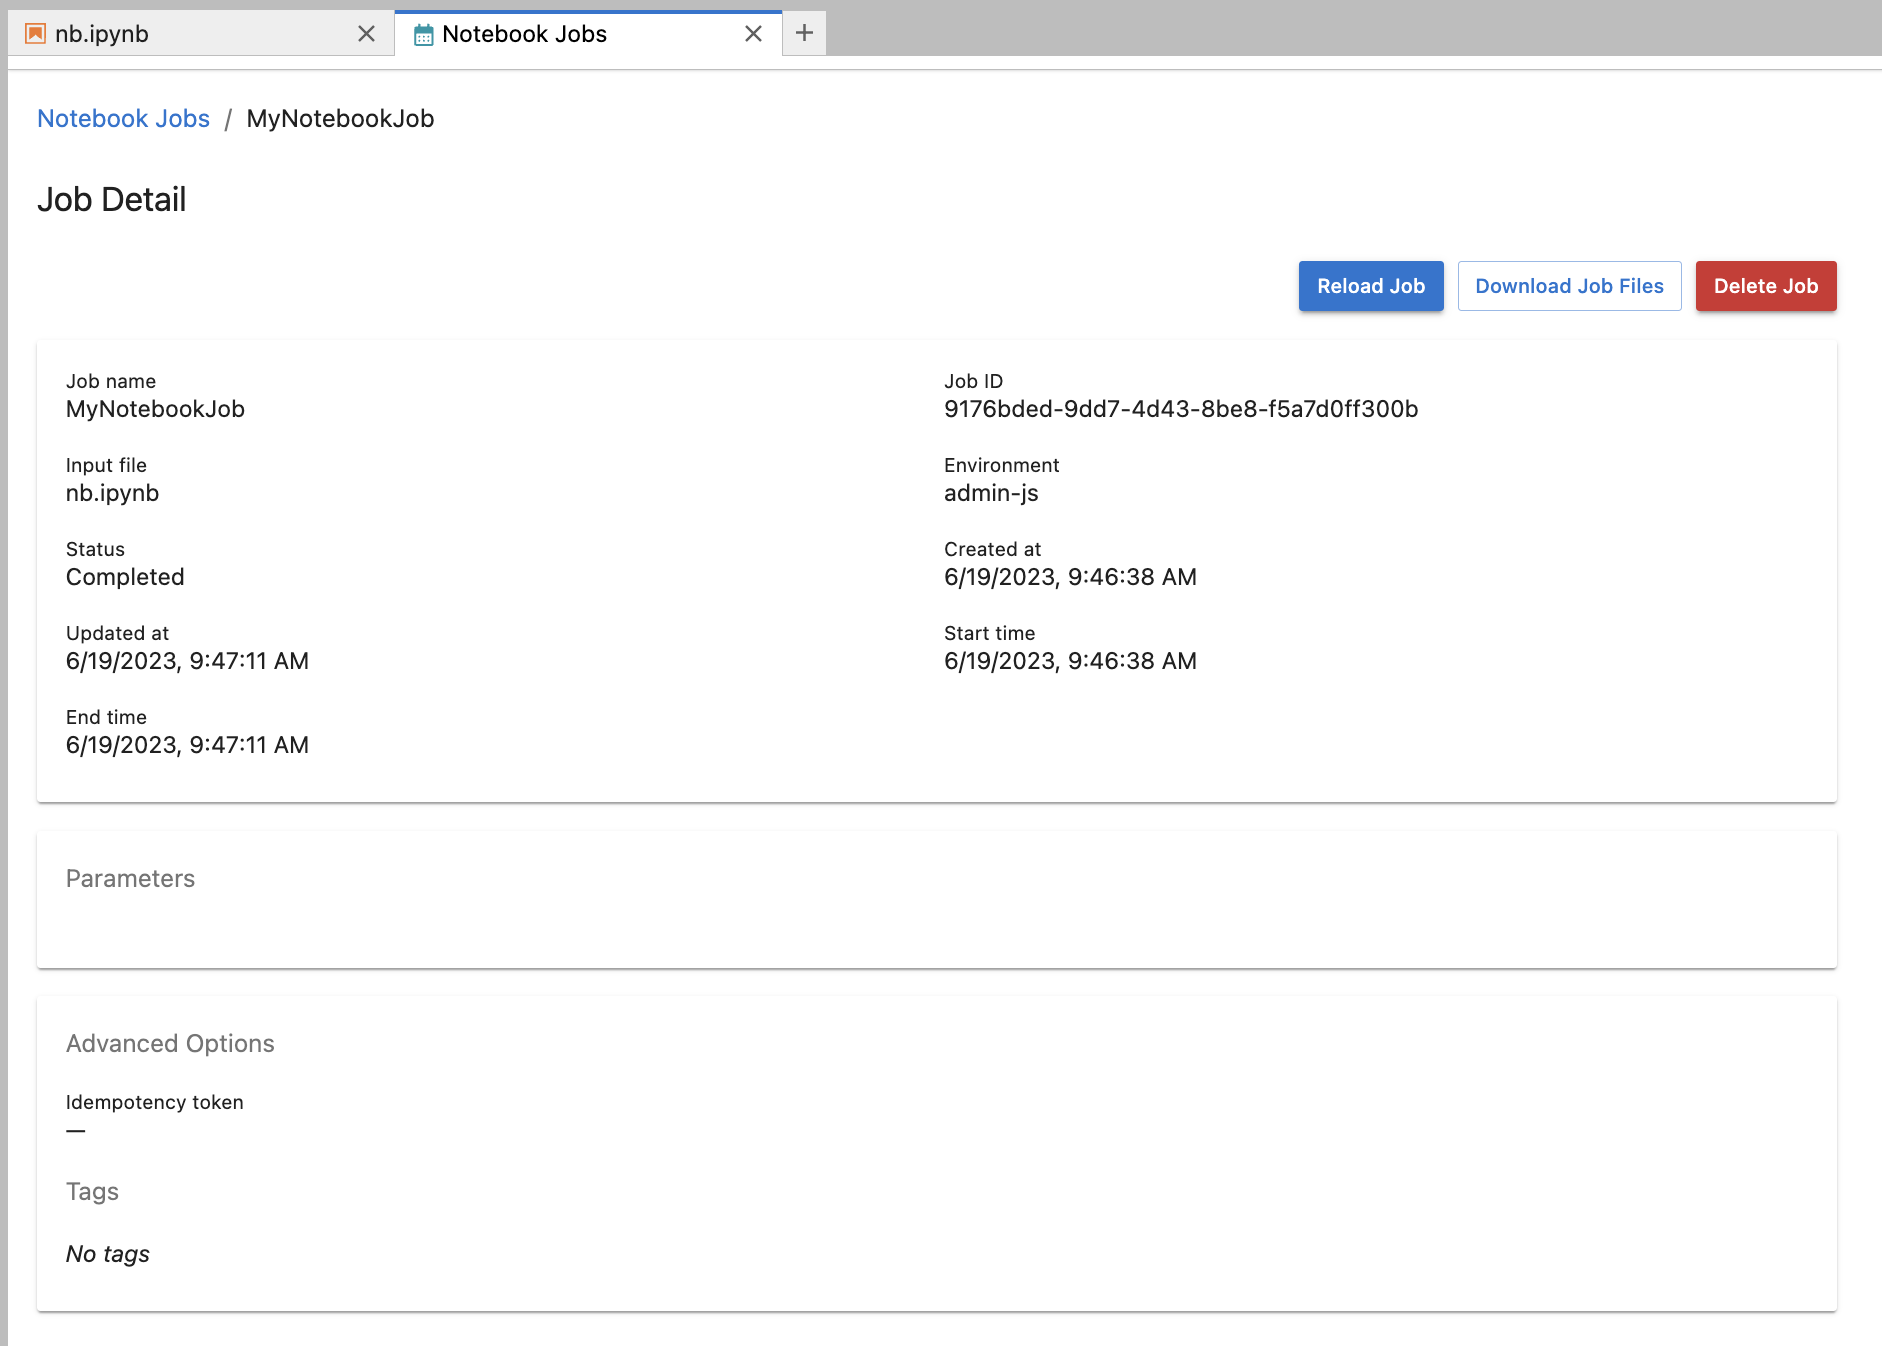
Click on the notebook job name to view more information about the job.
If you need to reopen the Notebook Jobs tab, look for the icon in the upper right of the JupyterLab launcher tab.
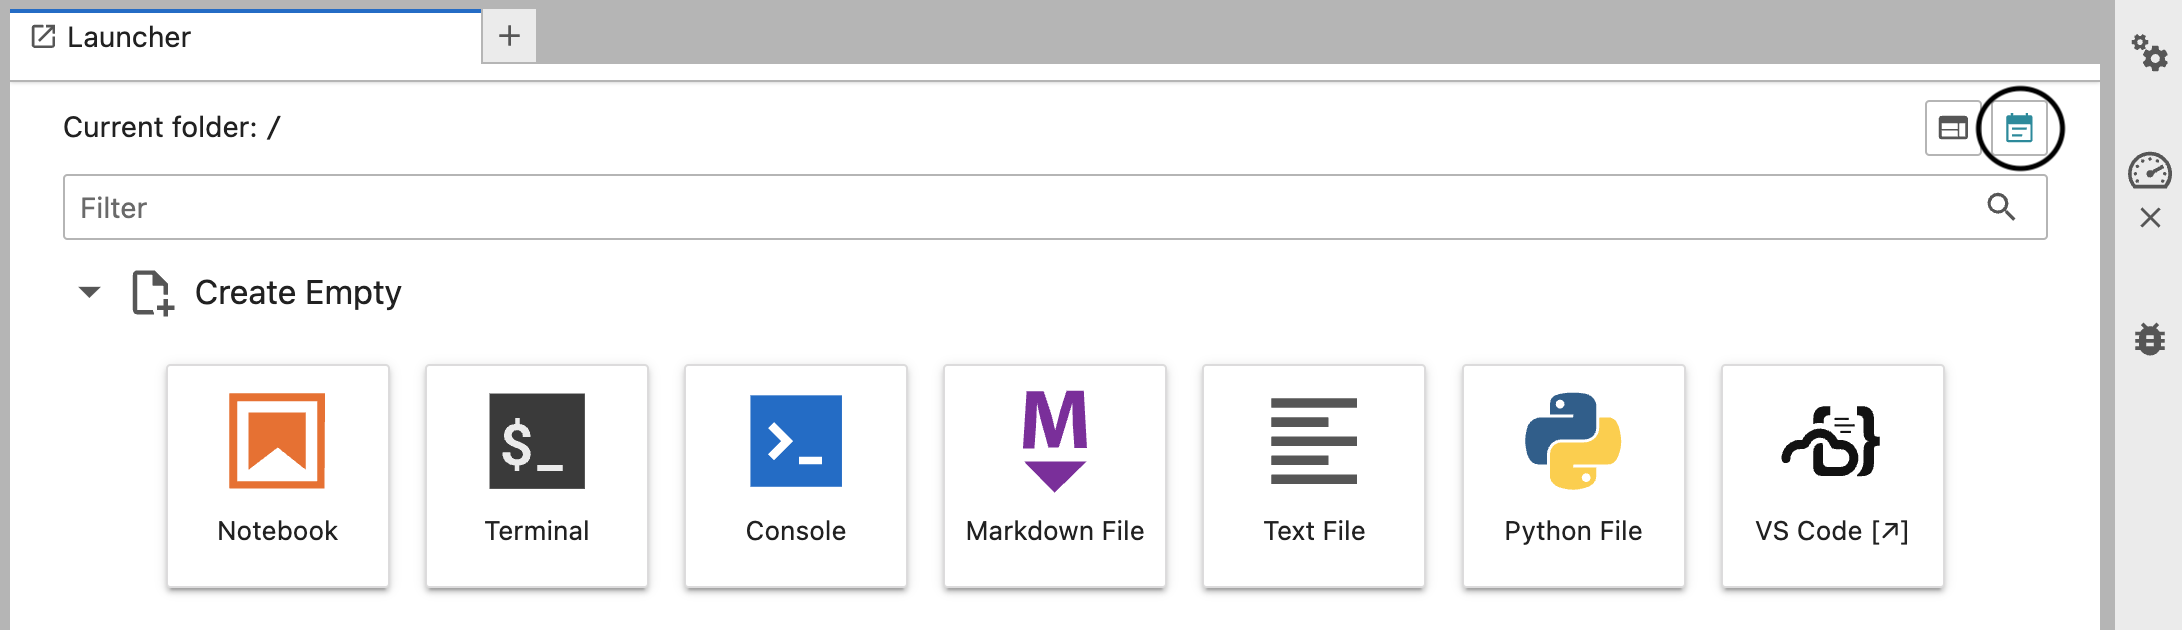
Submit Jupyter Notebooks to run on a schedule
Section titled “Submit Jupyter Notebooks to run on a schedule”The other way notebooks can be run is on a specified schedule, Jupyter-Scheduler refers to these as "Job Definitions". After selecting the Jupyter-Scheduler icon at the top of the notebook, select "Run on a schedule" and then define the schedule. There is also an option to specify the time zone.
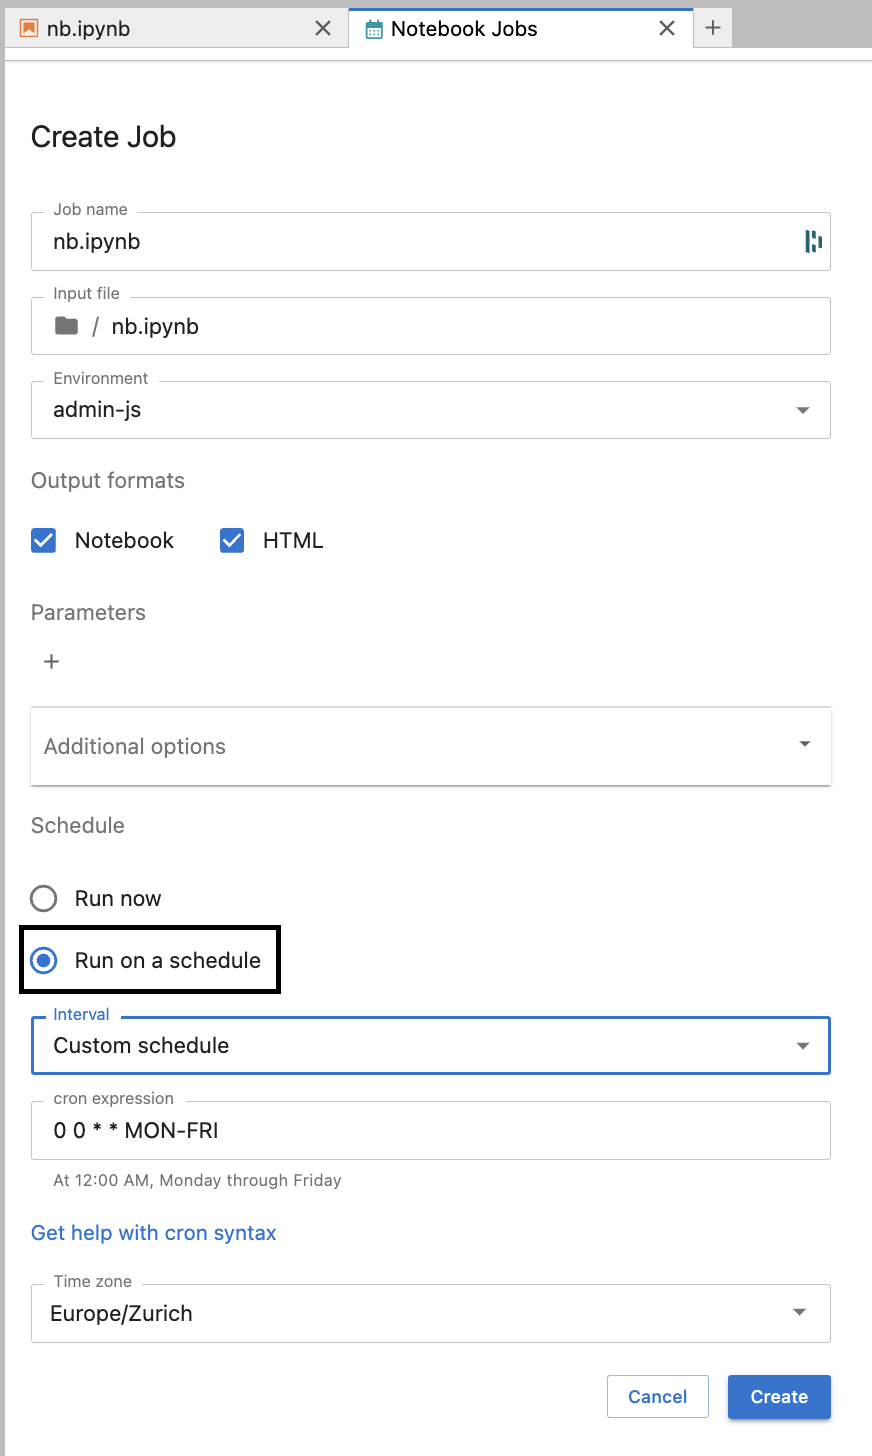
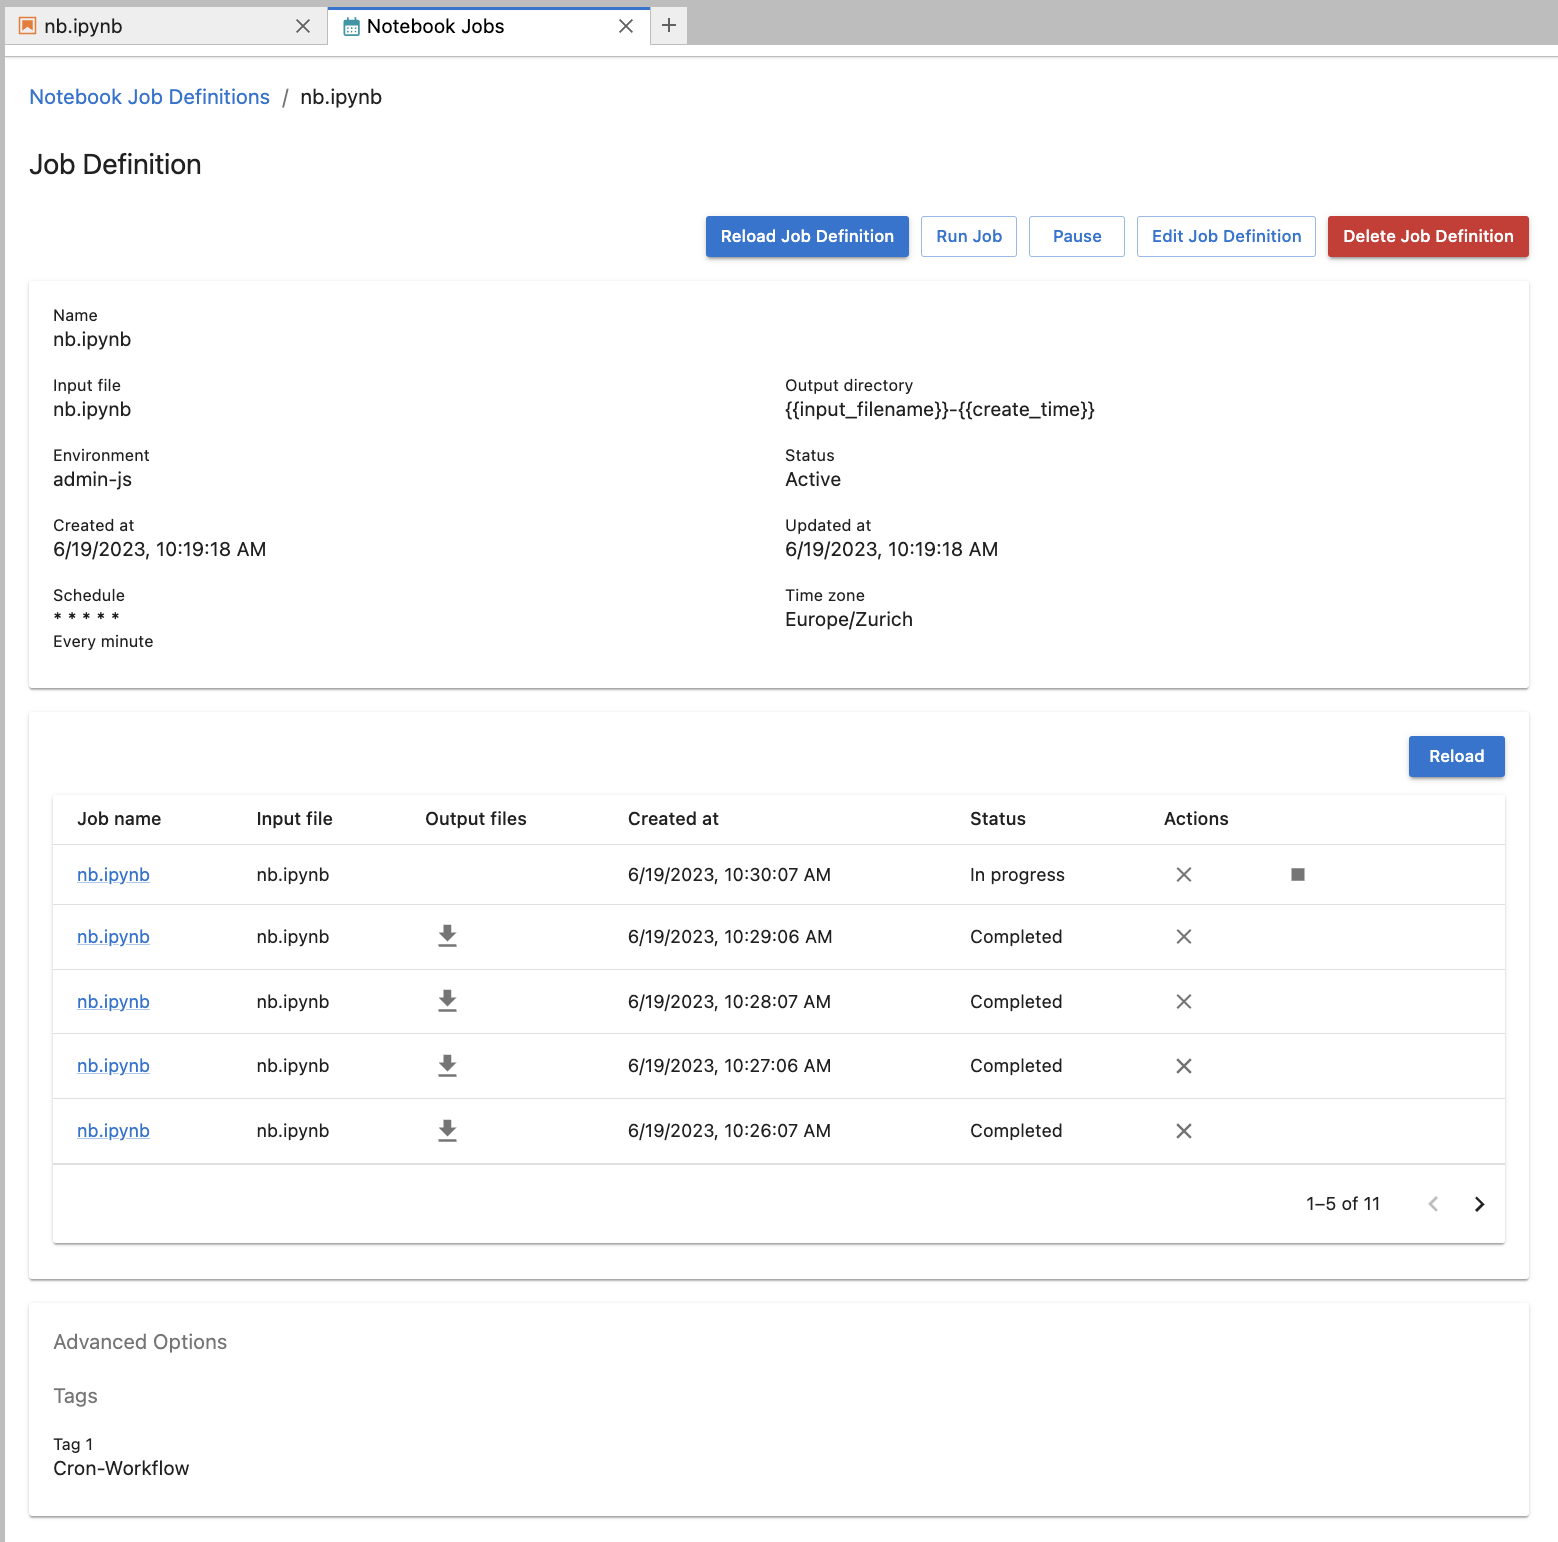
When a job definition is created, a new job is created at each time interval specified by the schedule. These jobs can be inspected by clicking on "Notebook Job Definitions" near the top of the Jupyter-Scheduler UI. From here you have several options, including:
- Delete the job definition
- Pause the job job definition
- view details such as the Status of the job definition
- view the list of notebook jobs created from this job definition
- view the Tags (by default all job definitions are tagged with
Cron-Workflow)
Debugging failed jobs
Section titled “Debugging failed jobs”Even if your notebook runs normally in JupyterLab, it might fail during a scheduled run.
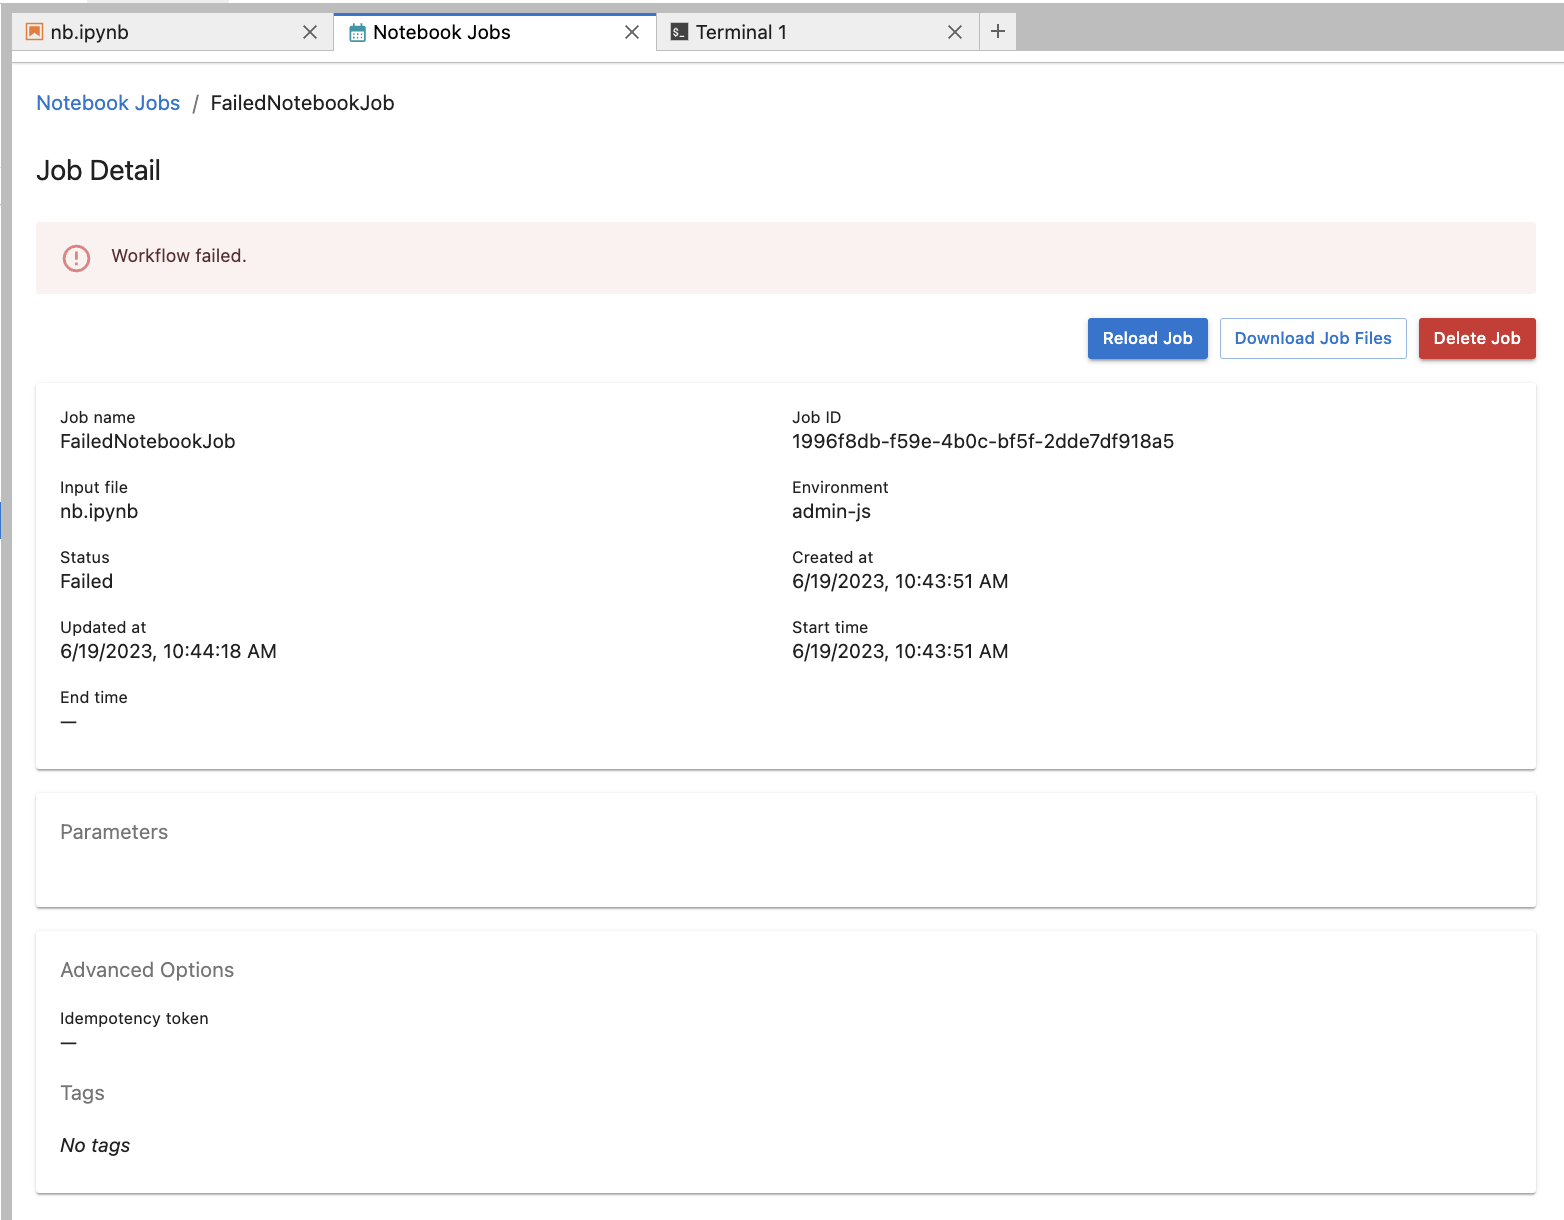
You can view the job log and the notebook using either the terminal or the file browser (go to the JupyterLab View menu and enable "Show Hidden Files"). These are the steps to get the logs:
- Find the job ID of your failed job
- Launch a terminal session or go to your file browser
- Navigate to
~/.local/share/jupyter/scheduler_staging_area - Find the folder that corresponds to the job ID
- Open (or
cat) any log file or notebook files and look for error information
Lastly, if the job fails without writing to the scheduler_staging_area, or the job status is stuck in In progress mode for an extended period of time, have an administrator try and view the specific logs on your JupyterLab server pod or on the workflow pod itself.