Using GPUs on Nebari
Introduction
Overview of using GPUs on Nebari including server setup, environment setup, and validation.
1. Starting a GPU server
Follow Steps 1 to 3 in the Authenticate and launch JupyterLab tutorial. The UI will show a list of profiles (a.k.a, instances, servers, or machines).
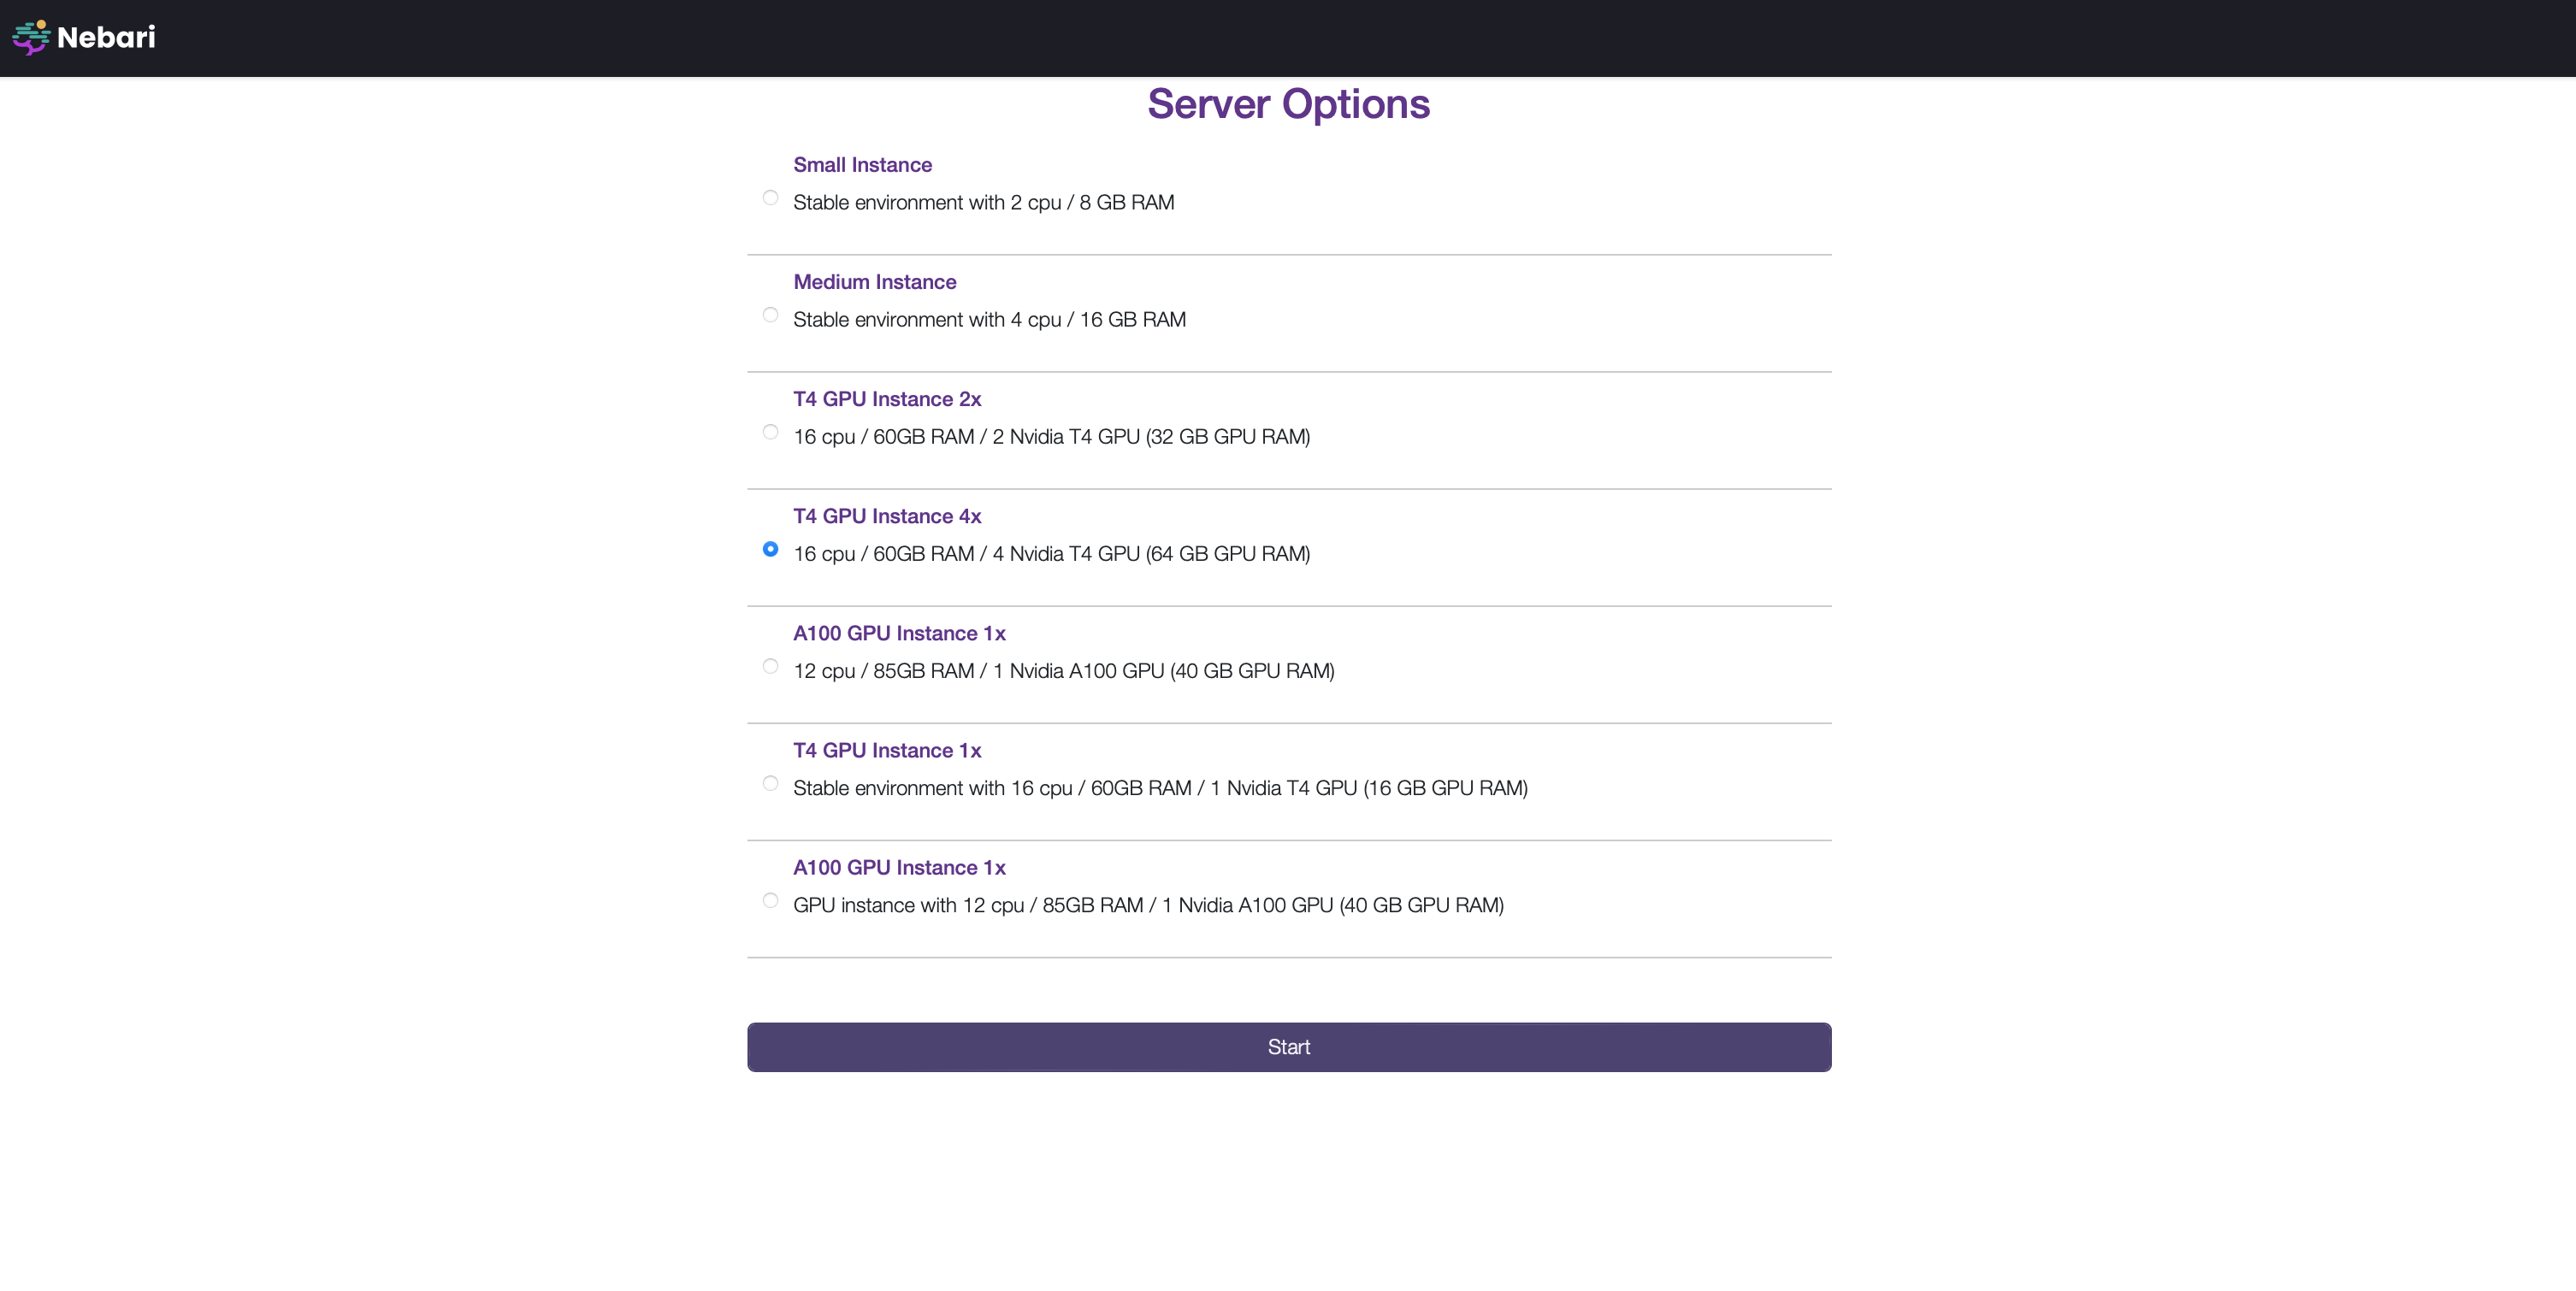 Your administrator pre-configures these options, as described in Profile Configuration documentation.
Select an appropriate GPU Instance and click "Start".
Understanding GPU setup on the server.
The following steps describe how to get CUDA-related information from the server.
- Once your server starts, it will redirect you to a JupyterLab home page.
- Click on the "Terminal" icon.
- Run the command
nvidia-smi. The top right corner of the command's output should have the highest supported driver.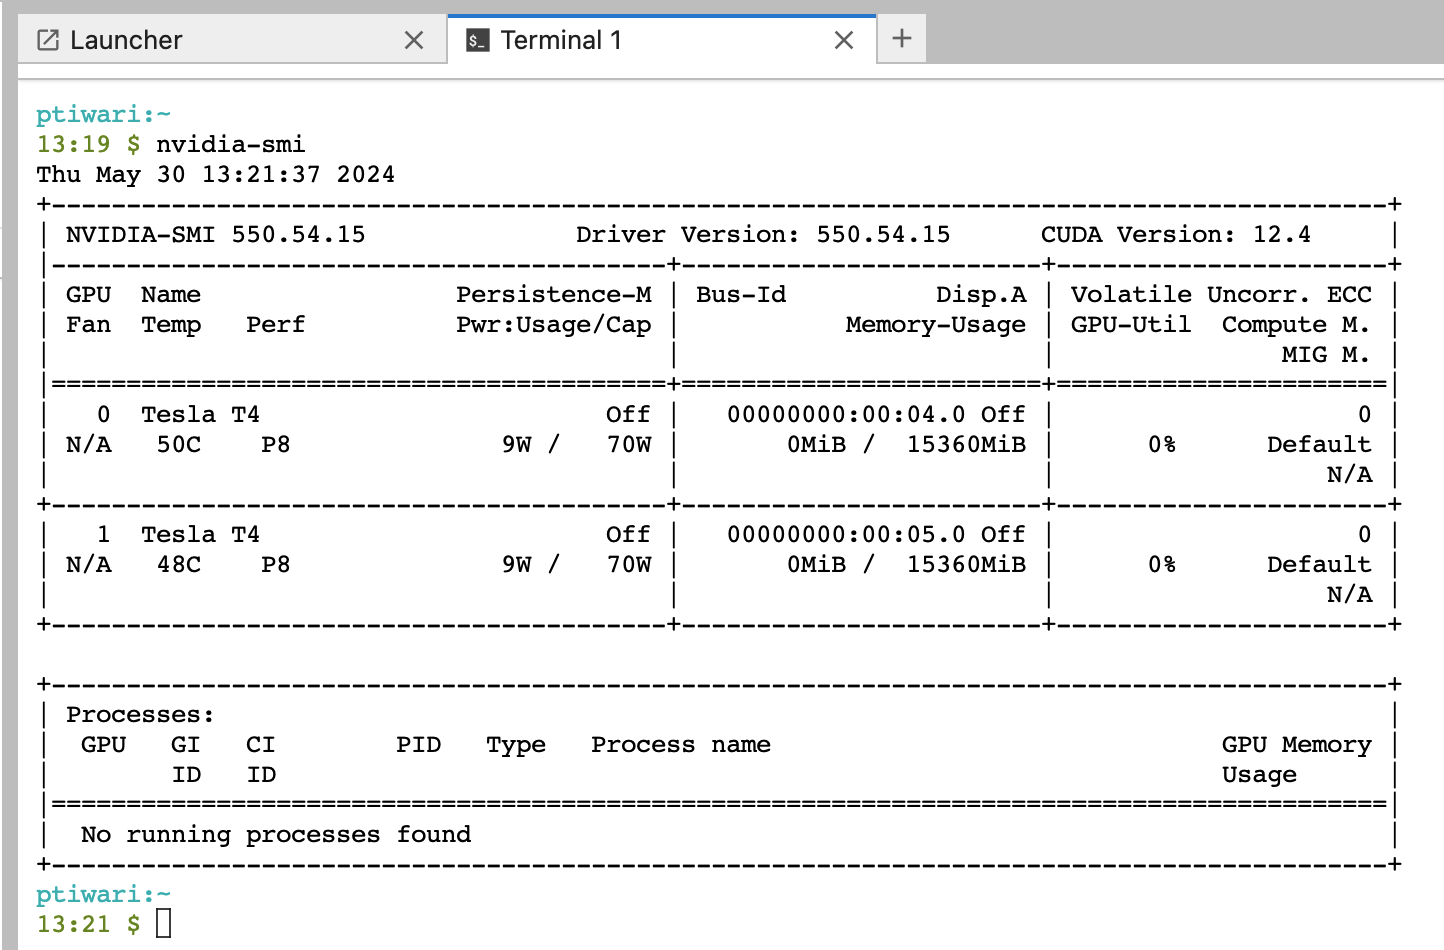
If you get the error nvidia-smi: command not found, you are most likely on a non-GPU server. Shutdown your server, and start up a GPU-enabled server.
Compatible environments for this server must contain CUDA versions below the GPU server version. For example, the server in this case is on 12.4. All environments used on this server must contain packages build with CUDA<=12.4.
2. Creating environments
Build a GPU-compatible environment
conda-store provides an alternate mechanism to enable GPU environments via the setting of an environment variable as explained in the conda-store docs.
Create the environment specification using CONDA_OVERRIDE_CUDA by creating a new environment and clicking on the **GUI <-> YAML** toggle to edit the yaml config.
channels:
  - conda-forge
dependencies:
  - pytorch
  - ipykernel
variables:
  CONDA_OVERRIDE_CUDA: "12.4"
Alternatively, you can configure the same variable using the UI.
At the time of writing this document, the latest CUDA version was showing as 12.4. Please follow the steps above to determine the highest supported version to use as an override value for the CONDA_OVERRIDE_CUDA environment variable.
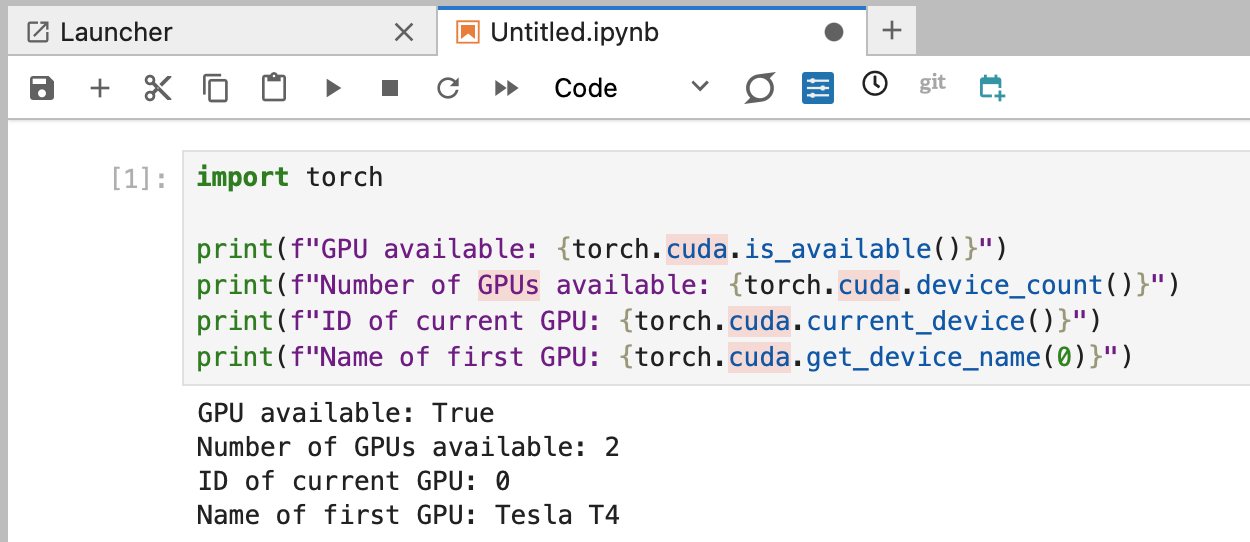
3. Validating the setup
You can check that your GPU server is compatible with your conda environment by opening a Jupyter Notebook, loading the environment, and running the following code:
import torch
print(f"GPU available: {torch.cuda.is_available()}")
print(f"Number of GPUs available: {torch.cuda.device_count()}")
print(f"ID of current GPU: {torch.cuda.current_device()}")
print(f"Name of first GPU: {torch.cuda.get_device_name(0)}")
Your output should look something like this: