Installing Nebari
This installation guide provides the basic instructions to install the Nebari deployer package CLI for the first time, and assumes you are already familiar with the Conda and Python packaging ecosystems. If you are already familiar with Nebari and would like information on advanced configuration options, skip to the Advanced Configuration section in this documentation.
This guide focuses on installing Nebari for cloud usage.
For other alternatives, visit the Choosing a deployment platform section for an overview of the available options and their respective installation steps.
Pre-requisites
Nebari heavily depends on Terraform and Python. The installation of the Terraform binary is built-in within the Nebari source code, and it is automatically downloaded during the first execution. Currently, only Linux and macOS are supported. Windows is only supported through the “Windows Subsystem for Linux” ("WSL").
- Currently, Nebari supports
Python >= 3.8 - For more details on Terraform and its dependencies, visit the official Terraform documentation
- To install conda, visit the official conda documentation, or if you prefer, visit the mamba installation documentation
How to install the Nebari Package
See Environment Management for best practices for using conda and pip to control your deployment environment.
There are currently two ways to install the Nebari CLI:
-
You can install Nebari directly from the Python Package Index (PyPI) using
pip. For most common architectures and platforms (Linux x86-64andmacOS x86-64),pipwill download and install the most recent version available.python3 -m pip install nebari -
Nebari is also available at conda-forge and can be installed using the
condapackage manager by running the following command:conda install nebari -c conda-forgeif you prefer mamba, you can use the following command:
mamba install nebari
The version of Nebari in your nebari-config.yaml must match your currently installed Nebari package version; otherwise, a warning will be raised when attempting to deploy. See Upgrading Nebari for techniques for upgrading your Nebari CLI or safely updating your older config file to match your Nebari package version.
The Nebari CLI will auto-detect and then deploy any Nebari Extensions that are installed in your Python environment, and extensions once deployed cannot be uninstalled. For this reason, we recommend creating a unique environment for each Nebari deployment, especially when managing multiple deployments with extensions.
Verify installation
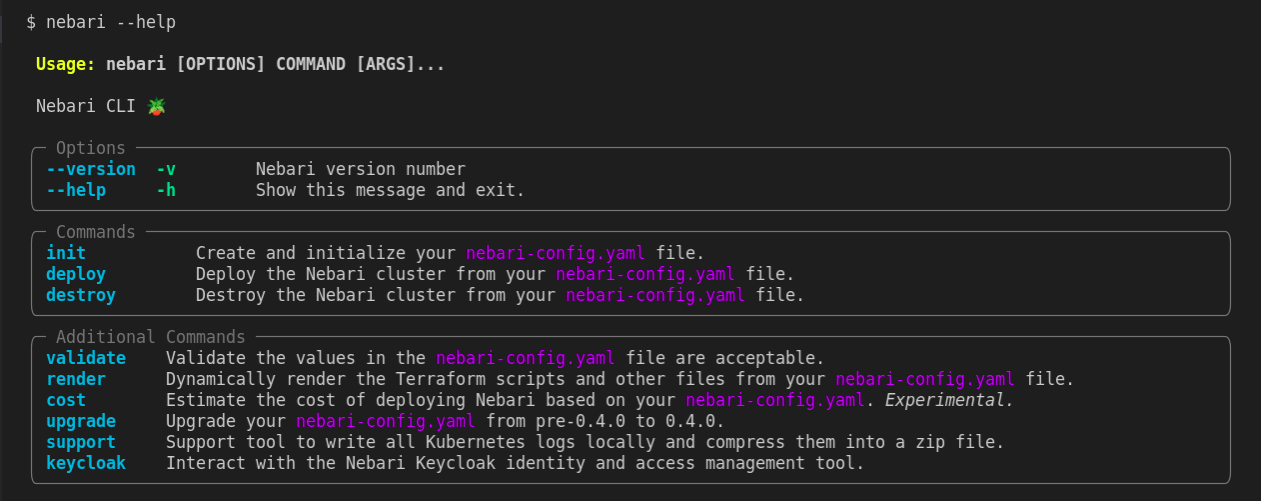
You can verify that the Nebari package is properly installed and you can execute the client commands by running:
nebari --help

If you are unable to successfully validate the Nebari installation above, you may want to check out our troubleshooting guide.
What's next?
Nebari Init and Guided Init
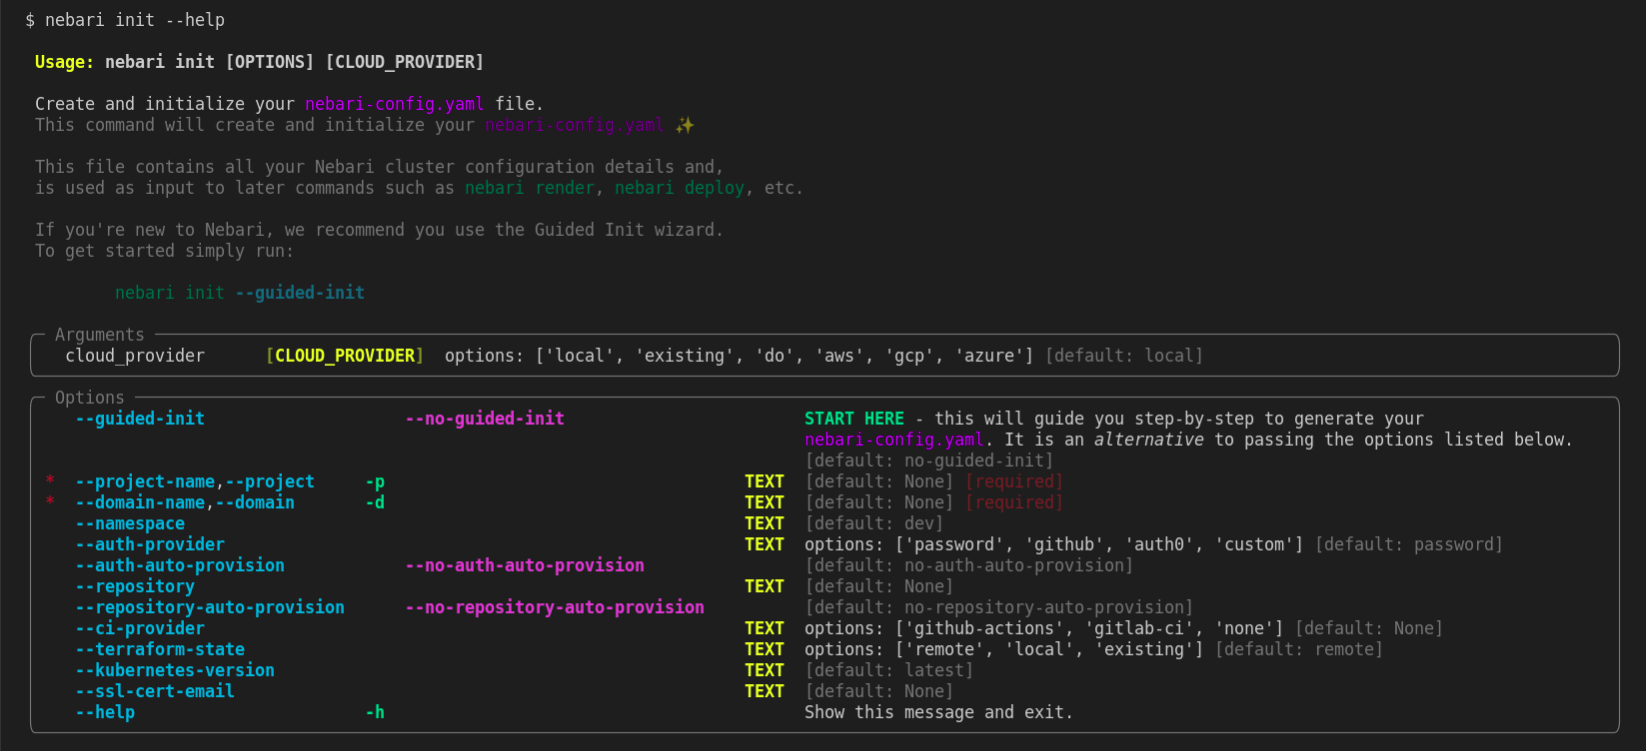
Nebari Init creates and initializes your Nebari configuration. Guided init does the same but you can have a step-by-step experience while running it.
You can pass the --help flag to the init command to check all the arguments and options available for it.
nebari init --help

You can pass the --guided-init flag to the init command to interact with Guided Init Wizard.
Next steps?
Need more information before deploying Nebari? Check out the following sections in the documentation:
- To get more insights on the multiple deployment methods for Nebari - check out the Choosing a deployment platform guide
- To learn more about the currently supported public cloud providers - check out the Supported cloud providers guide
Already made your mind about deployment? Check our handy how-to-guides:
- Deploying Nebari on AWS
- Deploying Nebari on Azure
- Deploying Nebari on GCP
- Deploying Nebari on a local cluster- using
kindno cloud required